Modelling continued.

continuing from last week, the next step was the forehead. this is easily done by extruding up the edges from around the eyes, and then curving the top.

the overall head shape was then completed by carrying on the extrusion of the forehead and curving it over the top of the scalp, keeping in line with the side reference image in particular. the nose was then modelled by extruding the faces around the bridge of the nose, and then connecting edges using the bridge tool. the shape was created by simply moving the vertices around to match the reference image.

to complete the head, the neck was needed. this involved extruding down the back of the head, making sure to create as many extrusions as needed to weld accurately with the side of the head.

the completed head, with added definition around the eyebrows.
after completing the most complicated part, the body was relatively easy. this tutorial was used to help with body modelling, as the simple method was easy to use, but also gave a great end result : http://www.3dtotal.com/team/Tutorials/benmathis/benmathis_body_1.php
the tutorial idea is to use cylinders to model the body parts, as the human body has a cylindrical shape. using an eight sided cylinder gives all the necessary sides needed for a low poly character.

first the arm was modelled. a cylinder was placed along the reference image, and then the edges and vertices moved to represent the shape . this gives the definition of the arm including joints and muscle shape.

to make the body the same method was used, however this time it was a lot more important to look at both sides of the reference image. the first image shows the front. definition has been added around the pelvis and abdomen, and some around the chest.

here is the side image. definition was added for the chest and the shoulder blades.

a symmetry modifier was added to each part.
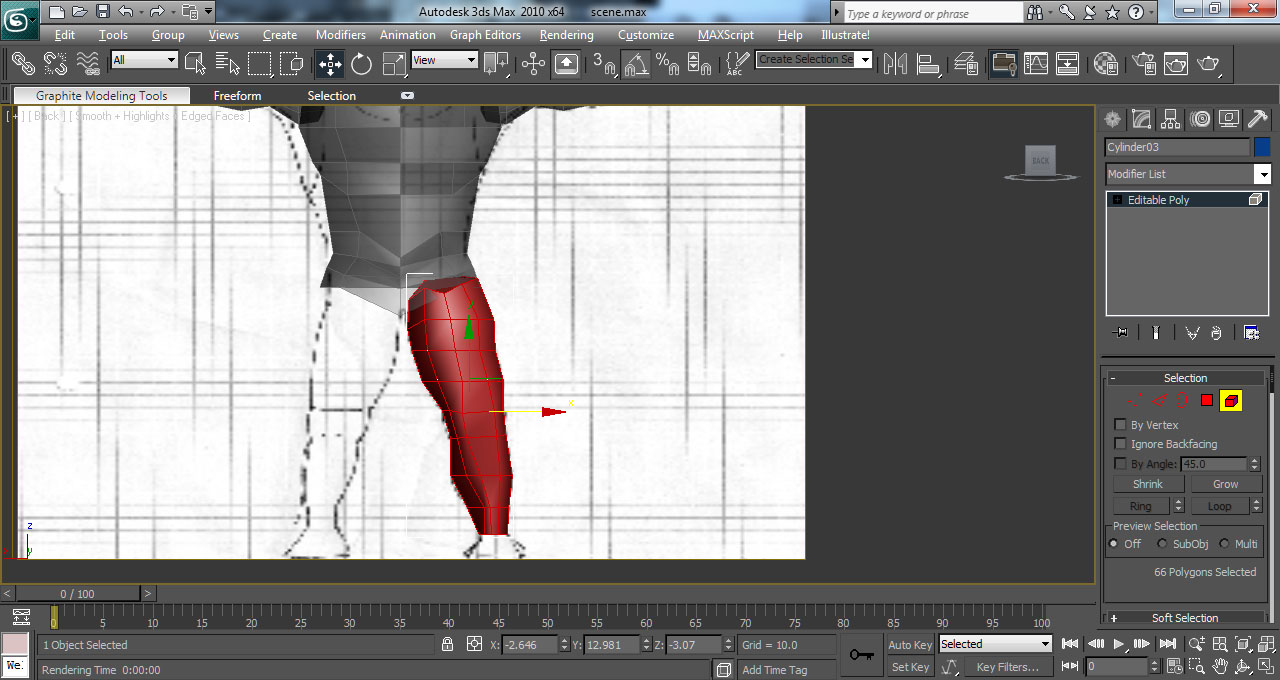
the legs were modelled the same as the arms. again the importance was on lining them up in both the front and side views, as there is a lot of definition in both.

the final step was to weld the parts together.
first the neck and head were attached at the object level, by selecting all the vertices of the head and then using the attach button. they can now be welded together.

the back of the neck was redone as there were too many faces, which meant it was hard to weld. the image above shows the much improved neck, with just 4 faces at the very back. to achieve the small amount of faces, the insert vertex tool was used. this allows vertices to be added along and edge without creating extra edges or faces. this meant that the multiple faces of the head could be welded to one edge on the neck (this can be seen in the above image, the one edge from the neck has been welded at many points, when there are about 6 edges on the head). the back of the head was also rounded more so re-doing the whole area was very beneficial.
Mathis, B., n.d. Low poly character modelling. [online] Available at: http://www.3dtotal.com/team/Tutorials/benmathis/benmathis_body_1.php [Accessed 21 February 2011].
No comments:
Post a Comment